My cousin was about to buy a stainless steel frying pan on sale this week, when she took a photo of it and texted me, “Do you think I can also make pizza in it?”
I love it when, every now and then, someone asks me a good cooking question. Stainless steel cookware is, after all, touted for its durability and versatility. If your pan has a metal handle and you don’t mind the burn marks, you could even use it over a campfire.
To be sure I wouldn’t mislead my cous, I double-checked the make and model of the pan online while she was eyeing it at the store. It turned out to be oven-safe as I expected.
But could she really bake pizza in it?
You can make pizza in an oven-safe stainless steel frying pan. Preheat the pan on the bottom rack of your oven to 550°F (290°C) for 45 minutes before slicing the pie on it. The hot surface of the pan will bake it in 8-10 minutes.
I’ve made pizza in my stainless steel pan plenty of times before. In the rest of this post, I’m going to share my technique with you.
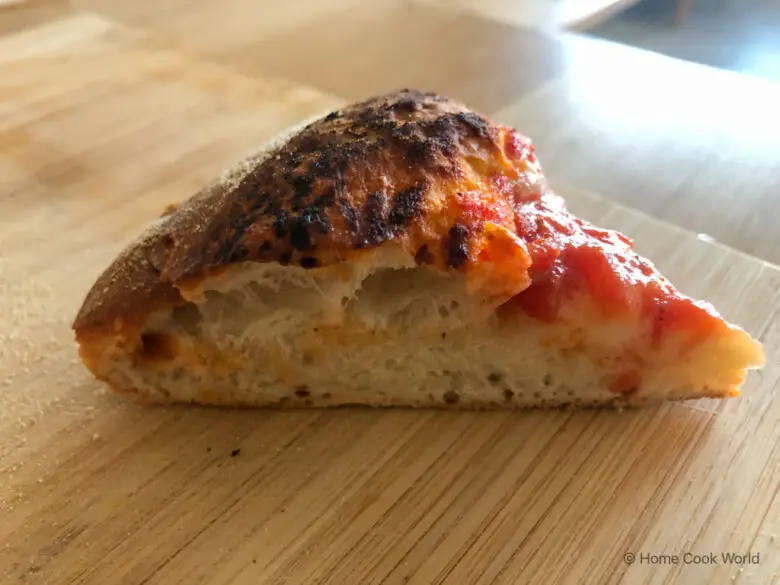
Using my it, your pizza will come out airy and crispy every single time you cook. Honestly, you’ll have a hard time telling the difference between it and other pies you’ve made in a cast iron skillet or on a baking stone.
Make Pizza in a Stainless Steel Frying Pan
Cous and all of you folks out there who want to make special homemade pizza in their stainless steel frying pans, here’s how I made mine.
Let the Store-Bought Pizza Dough Rise
In the past couple of days, I’d been feeling overworked and in need of a break, so I decided to go easy on myself and go for store-bought pizza dough. You could follow in my footsteps and get yours from the grocery store or neighbourhood pizzeria. Of course, you could also make your own pizza dough from scratch.
Store-bought pizza dough often gets a bad rap. As long as you know how to make the most of it, your pizza will come out surprisingly airy and crispy.
Sure, you don’t get to handpick what ingredients go into the dough or how it’s mixed and kneaded. But, in my experience, the doughs that you can get at Trader Joe’s or Whole Foods Market are pretty close to what most of us would otherwise end up making at home.
My secret for improving store-bought pizza dough is called patience. Dad jokes aside, most frozen doughs haven’t been given enough time to rise. And the longer the rise, which comes from the activity of the yeast, the more developed the texture, aroma, and taste of the dough.
To make store-bought pizza dough better, keep it in its original packaging and leave it in your fridge for 24-48 hours (before shaping). The yeast in the dough will feed on the sugars and starches in it, churning out gas bubbles and causing it to rise. The following day when you make pizza with it, it will come out airy and crispy.
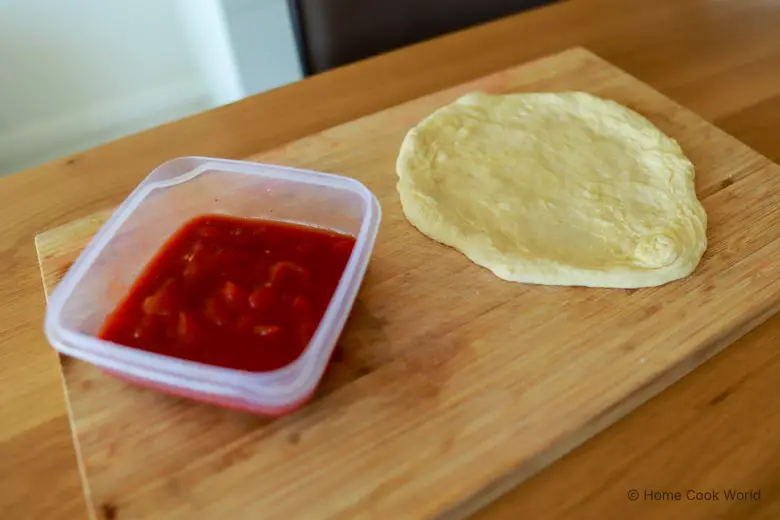
Just look at the difference:
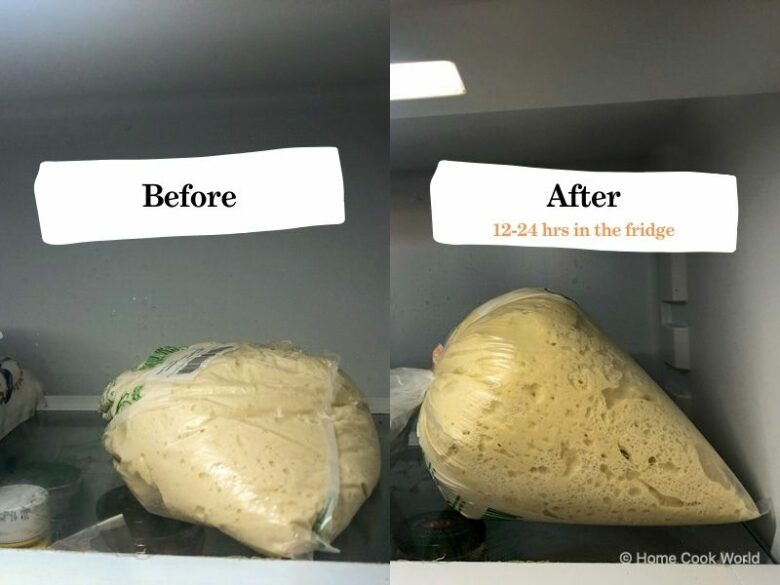
On the left is the dough the day I bought it from the store. On the right is how gassy it became after less than 24 hours in my fridge.
Preheat Your Frying Pan in the Oven for Enough Time
This is probably the most important part of this recipe, so please pay attention.
Before you slide the pizza pie on your pan, you need it to be up to maximum heat. The hot surface of the pan will puff up the dough as soon as it comes into contact with it, cooking it through and in an evenly fashion.
Preheat your frying pan in the oven for 45 minutes to a temperature of 550°F (290°C). Your oven needs time to heat up—and so does your stainless steel pan.
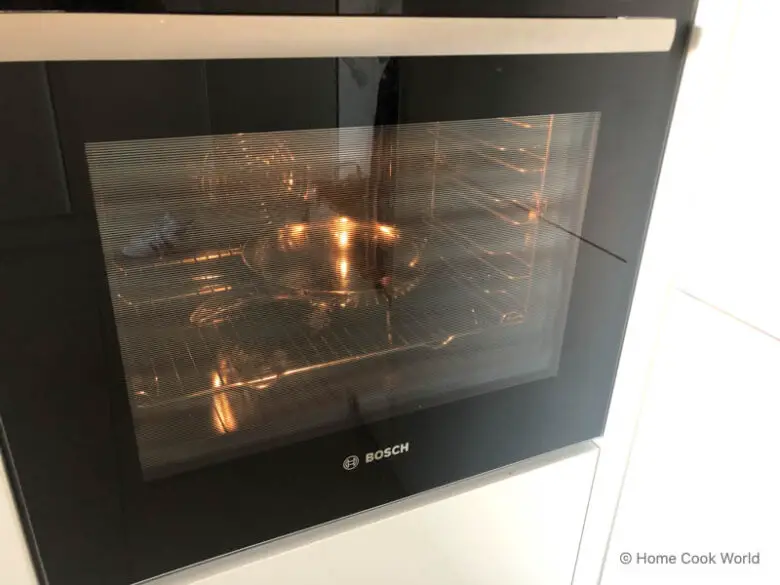
Here’s what to do in the meantime.
Cook a Simple and Savory Tomato Sauce
I made a simple tomato sauce for my pizza with ½ can of tomatoes, 1 pinch of sea salt, freshly-cracked black pepper, 1 clove of garlic, and 2 tablespoons of extra virgin olive oil.
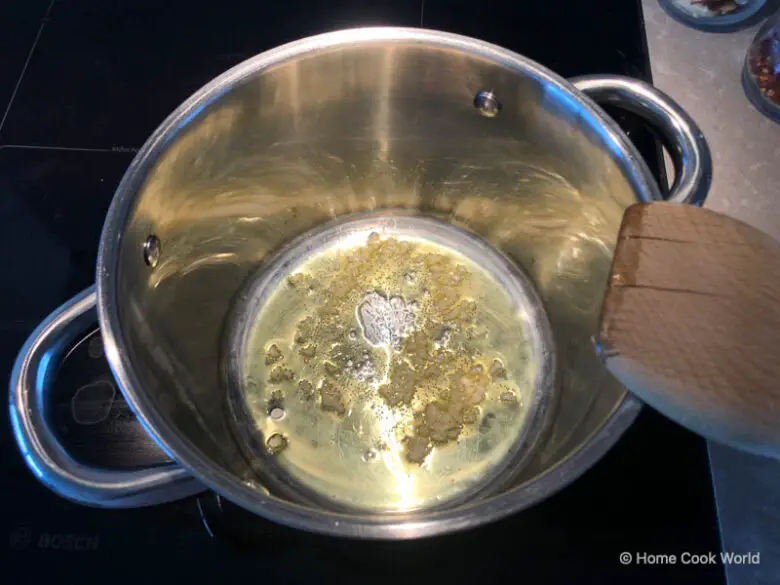
I poured some olive oil in my pot, turned up the heat on my cooktop to medium, and let it preheat for 1-2 minutes.
Meanwhile, I opened the can of San Marzano tomatoes, poured its contents in a tall food storage container, and crushed the juicy plum tomatoes by hand.
Personally, I like my tomato sauce chunky. Those of you who prefer it smoother could use an immersion blender to puree the tomatoes at this step.
I pressed down on the garlic clove with one side of my chef’s knife, which allowed me to crush it. Crushing garlic turns taking the peel off from a tedious choir into a hassle-free task.
I minced the garlic, threw it into the hot olive oil in my pot, and sautéed it for 30 seconds, stirring continuously, till it released its perfume in the air of my kitchen.
Garlic burns quickly and easily. When that happens, the garlic develops a bitter and off flavor that can ruin virtually any dish (including pizza sauce). This is why you should always sauté garlic over medium heat and for no longer than 30-45 seconds.
To prevent that from happening, I added the crushed tomatoes to the pot and seasoned the sauce with Mediterranean sea salt and freshly-cracked black peppercorn.
The aroma and flavor of black pepper comes mostly from the essential oils under the thick and sturdy walls of the dried berry. This is why freshly-cracked black pepper is always better than ground pepper. Simply said, you’re releasing the smell and taste when you most need it.
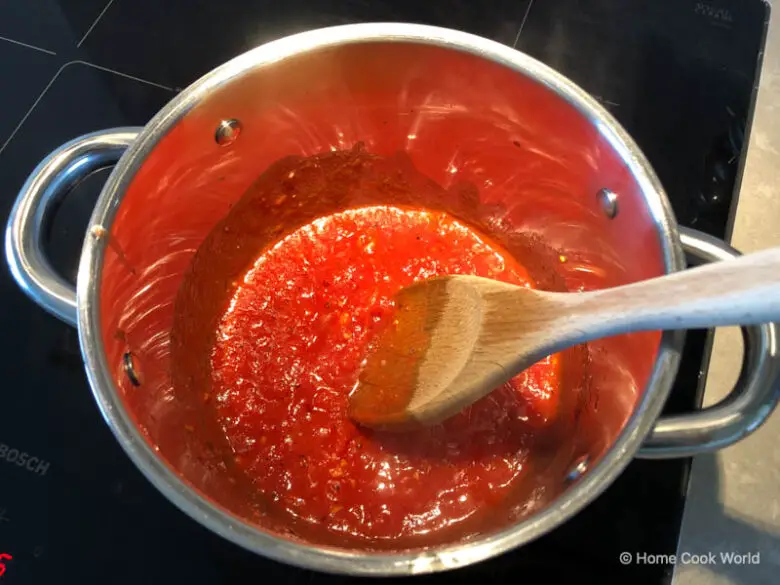
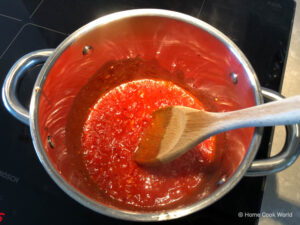
I simmered the tomato sauce, stirring occasionally, for about 4-5 minutes. As soon as it had reduced down to the consistency that I was looking for, I took the pot off the heat and transferred the sauce to a food container.
Prep the Toppings for Your Pizza
Contrary to popular belief, you don’t need many toppings to make a delicious pizza. All you need is a sauce (tomato-, cheese-, or cream-based), some kind of protein (sausage, pepperoni, canned anchovy, or freshly shucked clams), and cheese (mozzarella, gorgonzola, cheddar, or American processed cheese).
For this pizza, I decided to go simple and traditional. I’d top it with the cooked tomato sauce that I just made, a couple of leftover anchovy fillets lying around my fridge, and fresh mozzarella.
I opened the package of fresh mozzarella, drained it from the water, and teared it into small chunks using my hands.
Making pizza, as you see, can be a very hands-on process. You don’t necessarily need many tools.
When I make pizza at home, I like to tidy up my kitchen counter and turn it into a workstation that allows me to top the pie as soon as I’ve shaped it.
The pizza peel I’d normally use to slide the pie onto my baking stone is square-shaped and bigger than my 10-inch frying pan (and so is my wooden cutting board).
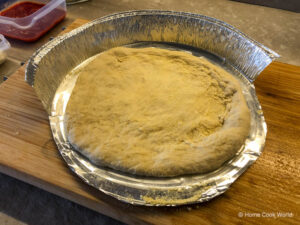
I had to come up with something different. I took a disposable aluminum-foil pizza pan, cut half of the side off using a pair of scissors, and sprinkled it with a generous amount of corn flour. This turned it into an improvised peel ideal which later proved to be ideal for the purpose.
Next, I dusted my hands with corn flour, took out the store-bought pizza dough from my fridge, and gently opened the package, pulled out about as much dough as a 4.4-oz mozzarella ball. This much dough is enough to make a 10-inch pizza for one person.
Never use a rolling pin on your pizza dough (unless you’re making thin-crust, bar-style pizza). The rolling pin will take out all of the gas bubbles produced by the yeast in the dough, and your pizza will come out flat and crusty.
Use your hands to stretch out the dough into a disc instead. Push out the gas bubbles into the crust by pressing down gently on the dough with your fingertips, starting from the center. This is how you get a pie that’s thin in the center and fluffy on the outside.
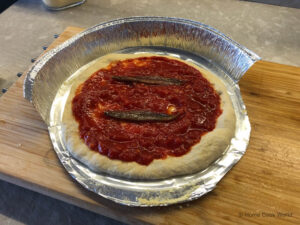
By now, your pizza should look something like this:
Top the Pizza and Bake It
I topped the pizza with the tomato sauce and the anchovy fillets, mozzarella setting the cheese aside for later.
“What?!”, some of you may be thinking as you’re reading this step. “Aren’t you supposed to bake the pizza with all the toppings?”
Don’t worry, we’re not about to make cold-cheese pizza. I’m going to show you a trick that I learned from Enzo Coccia, Italian pizzaiolo, owner of Pizzeria La Notizia in Naples, and author of the book, The Neapolitan Pizza: A Scientific Guide about the Artisanal Process.
Here’s the thing. The best pizzerias in the world make pies in wood-fired pizza ovens. These ovens reach temperatures as high as 800°F (425°C) and can bake a pizza in as little as 60-90 seconds.
Most home ovens, in comparison, don’t get hotter than 600°F (315°C). Which is why they take 8-10 minutes to bake a pizza pie properly. If you put the cheese with the rest of the toppings, as most of us do, the cheese will dry out and burn by the time the crust is ready.
And browned cheese is hard for your stomach to digest. When you’re making pizza, you’re looking to get an airy charred crust, cooked toppings, and wet cheese. You do that by adding the cheese later.
Set the fresh mozzarella aside and bake the pizza with the tomato sauce and anchovy fillets only. Top the pizza with the cheese 2-3 minutes before it’s done baking in the oven. That way, the cheese will melt, but come out wet and lively.
Trust me on this. Since I learned this technique, this is the only way I’ve been making pizza. Try it out and you’ll understand why.
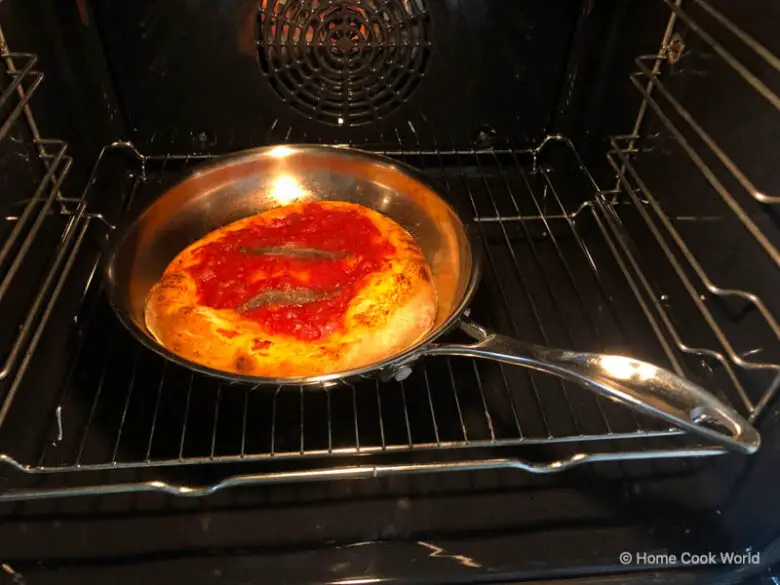

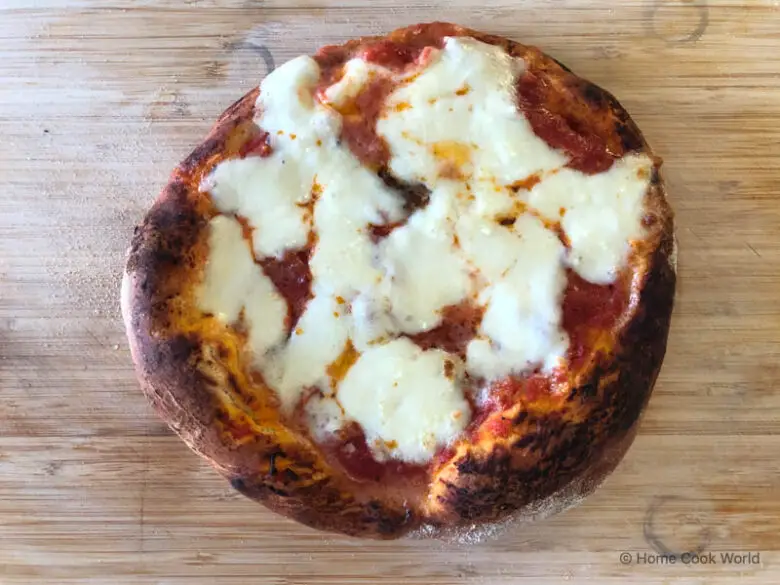
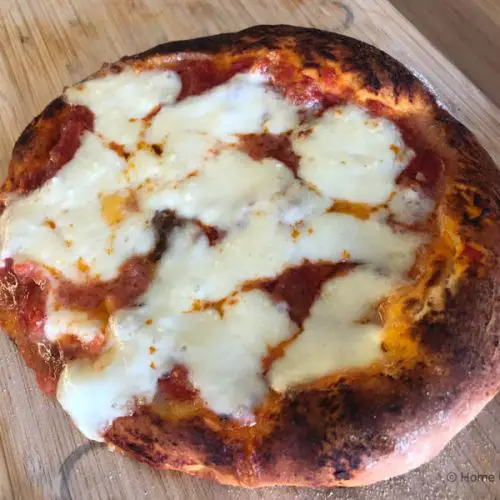
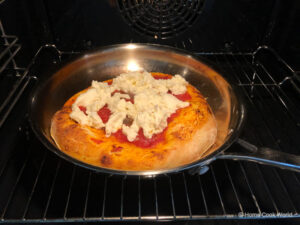
Practicing what I preach, I baked the pizza with the tomato sauce and anchovy fillets for 6 minutes, then topped it with the fresh mozzarella 2 minutes before it was done.
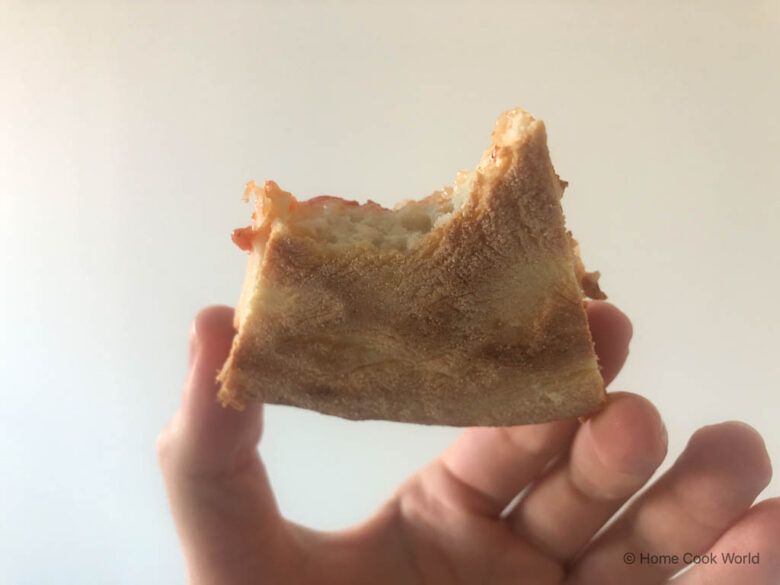
For those of you wondering if the heat from the stainless steel pan was enough to bake the pizza’s crust, here’s a couple of photos to show it:
How to Tell If Your Stainless Steel Pan Is Oven-Safe
Before you set out to make this recipe, make sure that your cookware is oven-safe.
Most stainless steel frying pans with metal handles are safe to use in the oven at temperatures of up to 500-600°F (260-315°C). To determine the maximum temperature for your frying pan, look for it in the user manual (or, if you’ve lost it, look up the make and model online).
This is especially true for tri-ply, five-ply, and seven-ply cookware made with multiple layers of stainless steel clad around other, more conductive metals like aluminum and/or copper. Its heaviness and thickness makes it capable of withstanding the high heat of your oven.
Pizza in a Stainless Steel Pan
Equipment
- Stainless steel frying pan
Ingredients
Pizza Dough
- 7 oz pizza dough
Pizza Sauce
- 2 tbsp olive oil (extra virgin)
- 1 clove garlic
- ½ can tomatoes (San Marzano plum tomatoes)
- 1 pinch salt (Mediterranean sea salt)
- 1 pinch black pepper (freshly-cracked black peppercorn)
Pizza Toppings
- 5.3 oz fresh mozzarella
- 0.35 oz canned anchovy fillets
Instructions
- Preheat your stainless steel frying pan in the oven to 550°F (290°C) for 45 minutes.

- Cook tomato sauce with extra virgin olive oil, canned tomatoes, minced garlic, sea salt, and black pepper to taste.
- Stretch out the pizza dough by hand. Gently press down on the dough with your fingertips, pushing the air bubbles out to the crust.
- Top the pizza with the tomato sauce and the anchovy fillets. Set the fresh mozzarella aside for later.
- Transfer the pizza to the hot pan and bake it for 7-8 minutes.

- Top the pizza with the fresh mozzarella and bake for 2-3 minutes more.
- Plate, cut, and serve the pizza.

